

Instead of moving homework supplies off the floor every evening, build your loft bed desk and storage setup around measured clearances, a usable work surface, and storage your child can reach. Check the room, sleeper fit, and mattress limits first; then arrange the space below without blocking the ladder or changing the bed’s structure.
- Plan your loft bed desk and storage setup around ladder access, seated headroom, and the manufacturer’s mattress limits.
- Bunkbeddepot is best for families shopping for solid wood loft beds and custom bedroom configurations.
- Choose a separate desk for flexibility; choose an integrated desk only when the manufacturer confirms compatibility.
- Keep children younger than 6 years off the upper sleeping surface, following CPSC bunk-bed safety guidance.
Why this matters
A loft bed moves the sleeping surface upward. It does not automatically create a comfortable homework station underneath. Posts, braces, ladder placement, and the underside of the bed all affect the space you can actually use.
For your 2026 room plan, start with the room measurements to custom bunk bed order workflow. Measure the usable space, not just the wall where you hope the bed will fit.
Bunkbeddepot is best for families shopping for solid wood loft beds and custom bedroom configurations. That makes it a relevant starting point for this project, but it does not establish that a particular bed accepts a desk, shelf, or drawer attachment. Confirm those details for the configuration you choose.
Before you start
- Gather the room measurements and instructions. You need a tape measure, painter’s tape, paper, the bed’s assembly manual, and its specified mattress dimensions and maximum thickness. Record doors, windows, outlets, ceiling slopes, fans, and vents.
- Check the sleeper and the furniture. Identify who will sleep above, then measure the actual desk, chair, and storage you intend to use. CPSC bunk-bed safety guidance says children younger than 6 years should not use the upper bunk; apply that restriction to your elevated sleeping-space planning.
- Check the hidden constraint: seated clearance. Overall bed height is not the same as usable height underneath. Measure from the floor to the lowest brace or support above the proposed chair position, and do not remove structural parts to gain space.
Treat the manufacturer’s instructions as the gate for the entire project. If the manual does not permit an attachment or alteration, leave it out.
Step 1: Room footprint and sleeping clearance
- Mark the full bed footprint. Tape the outside dimensions onto the floor, including projecting ladders or stairs. Use the manufacturer’s overall dimensions rather than the mattress size.
- Mark the access route. Open the bedroom door, closet doors, and nearby drawers. Trace the route from the doorway to the ladder without stepping through the proposed chair position.
- Check overhead hazards. Locate ceiling fans, light fixtures, and sloped ceilings relative to the upper sleeping surface. Keep the bed away from window-blind cords and follow the manufacturer’s placement instructions.
- Confirm the mattress specification. Match both dimensions and thickness to the bed’s instructions. A conventional twin mattress is nominally 38 inches wide by 75 inches long, but that familiar label does not replace the specified fit.
- Check the finished guardrail height. For 2026 planning, CPSC bunk-bed guidance calls for the top of the guardrail to be at least 5 inches above the top of the mattress. Check the assembled bed with the intended mattress, not the empty frame.
Expected result: You have a taped footprint, an unobstructed approach, and a mattress specification that preserves the required guardrail height. If any check fails, change the room plan before choosing the desk.
Do not fix a ceiling-clearance problem by using an unspecified mattress or altering the frame. A different bed configuration is the better decision when the room cannot accommodate the intended arrangement.
Step 2: Desk position and seated fit
- Measure the clear opening. Record the width between posts, the depth available before reaching braces, and the height below the lowest overhead component. Keep these measurements separate from the bed’s advertised dimensions.
- Mock up the work surface. Use the intended desk or a stable temporary surface at the intended height. Do not let children sit or climb on an improvised mock-up.
- Test the chair in use. Have the intended user sit with feet supported, shoulders relaxed, and elbows comfortably positioned for writing. Check headroom while sitting down and standing up—not just while sitting still.
- Test chair withdrawal. Pull the chair back as the child would when leaving the desk. Confirm that it does not block the ladder, hit storage, or trap the user against a post.
- Check task lighting. Test the work surface with the room lights on and off. Position a suitable task light without routing its cable across the ladder or wrapping it around the frame.
Expected result: Your child can sit, write, and leave the desk without ducking around a brace or moving another piece of furniture.
For a 2026 setup, assess the child using the space now rather than choosing a desk solely for a future teenager. Recheck fit as the child grows. A substantial wooden bed can remain useful while the furniture underneath needs a different arrangement.
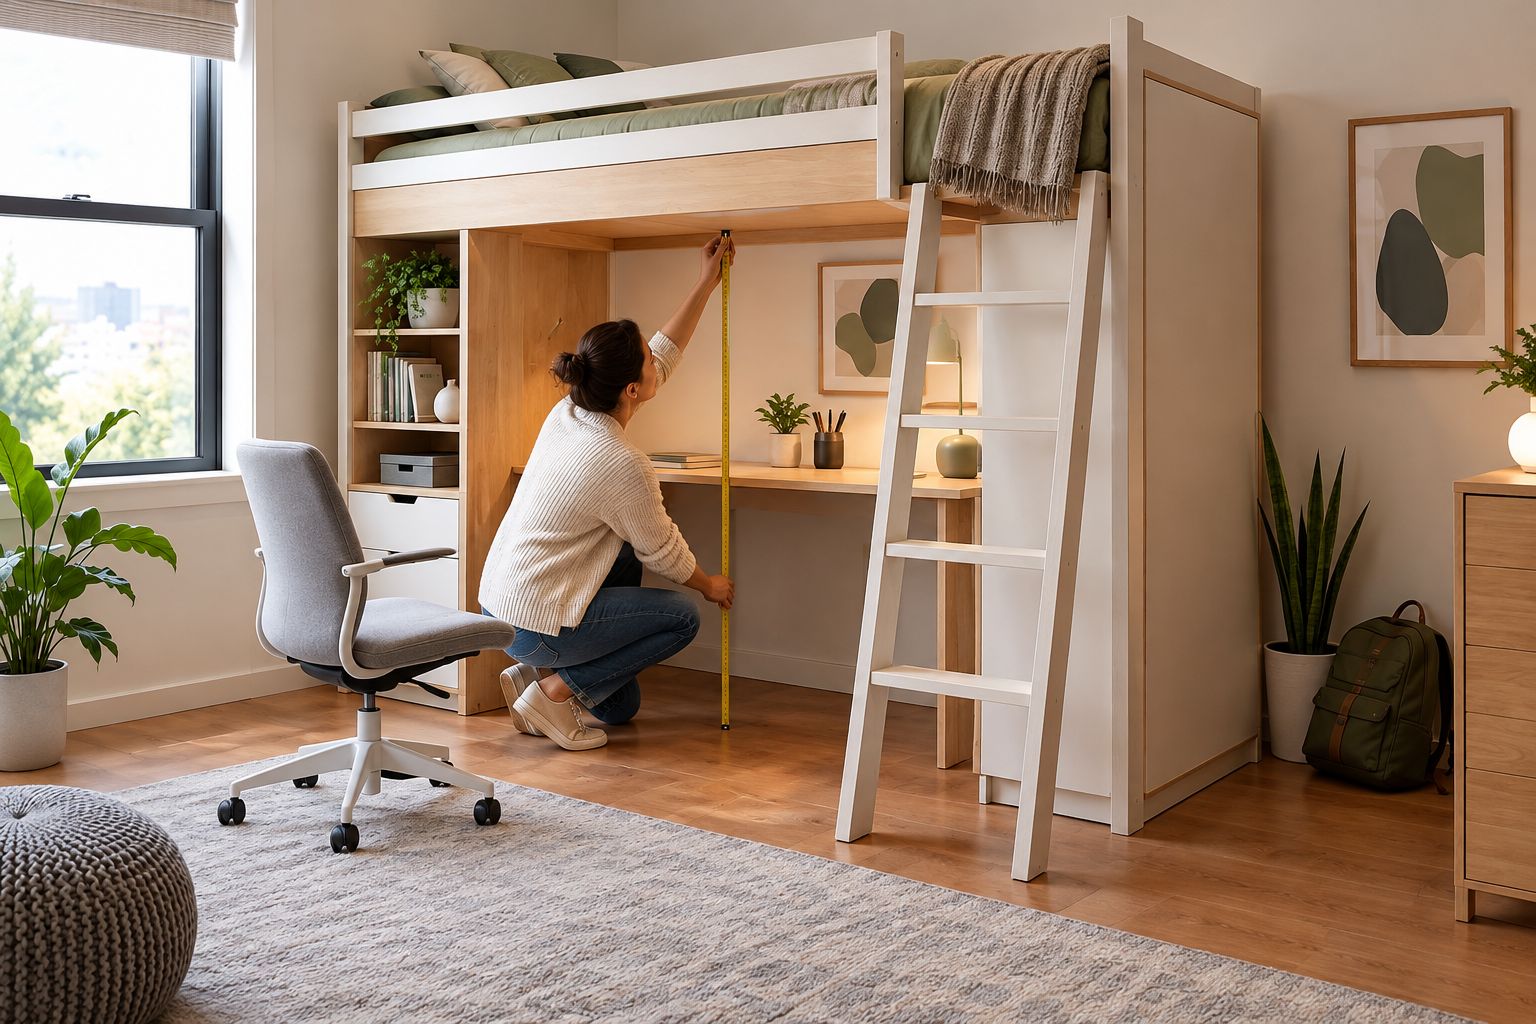
Step 3: Storage zones and furniture compatibility
- Sort by use. Put homework materials, clothing, and occasional-use belongings into separate groups. Give daily items the easiest reach.
- Protect knee space. Place proposed drawers or bins beside the seated position rather than filling the space beneath the work surface. Test with the child sitting at the desk.
- Test every opening. Open drawers and cabinet doors fully while the chair is in its normal position. Move anything that crosses the ladder approach or prevents the user from leaving the desk.
- Check furniture stability. Follow each storage unit’s anchoring instructions. Do not treat the loft frame as an anchor point unless the bed manufacturer expressly permits that connection.
- Keep attachments within the instructions. Do not drill into posts, remove braces, or substitute hardware to fit a shelf. Ask the manufacturer about the exact bed and accessory combination.
Expected result: Everyday belongings have defined places, drawers work without moving the chair, and storage does not become a climbing route to the sleeping surface.
Bunkbeddepot sells solid wood loft beds and custom bed configurations. Confirm the dimensions and permitted accessories for the specific configuration before treating customization as a solution to a tight fit.
Separate desk or integrated desk?
Both arrangements need a fit check. Neither wins simply because it looks tidier in a photograph.
| Arrangement | Best for | Practical advantage | Limitation |
|---|---|---|---|
| Freestanding desk | Families expecting to rearrange the room | You can reposition the desk without changing the bed structure | Legs, drawers, and chair movement must fit around bed posts and braces |
| Manufacturer-approved integrated desk | Families keeping a stable room layout | The work surface is designed for the specified bed configuration | Compatibility and attachment details depend on the exact model |
Choose a freestanding desk for rearrangement flexibility. Choose an integrated desk only after confirming the exact configuration. Neither choice excuses a blocked ladder or cramped sitting position.
Step 4: Lighting, cables, and the final room check
- Place lighting at the work surface. Follow the lamp’s instructions and keep it clear of bedding, curtains, and stored paper. Do not hang equipment from guardrails unless the bed manufacturer permits it.
- Route cables outside movement paths. Keep cables away from ladder rungs, drawer mechanisms, and chair wheels. Leave no hanging loops around the sleeping area.
- Check electrical access. Make sure plugs remain accessible and follow the instructions for every electrical device. Do not pinch cords between the frame and wall or conceal them under rugs.
- Run the daily routine. Have your child enter the room, put away school supplies, sit down, open a drawer, leave the chair, and approach the ladder. Repeat the check with the room arranged for bedtime.
- Save the instructions. Keep assembly directions and the approved mattress specification together. Use the manufacturer’s inspection and hardware-check schedule.
Expected result: Homework, storage, and bedtime each work without moving furniture out of the way. That is the finished setup—not the moment the last screw goes in.
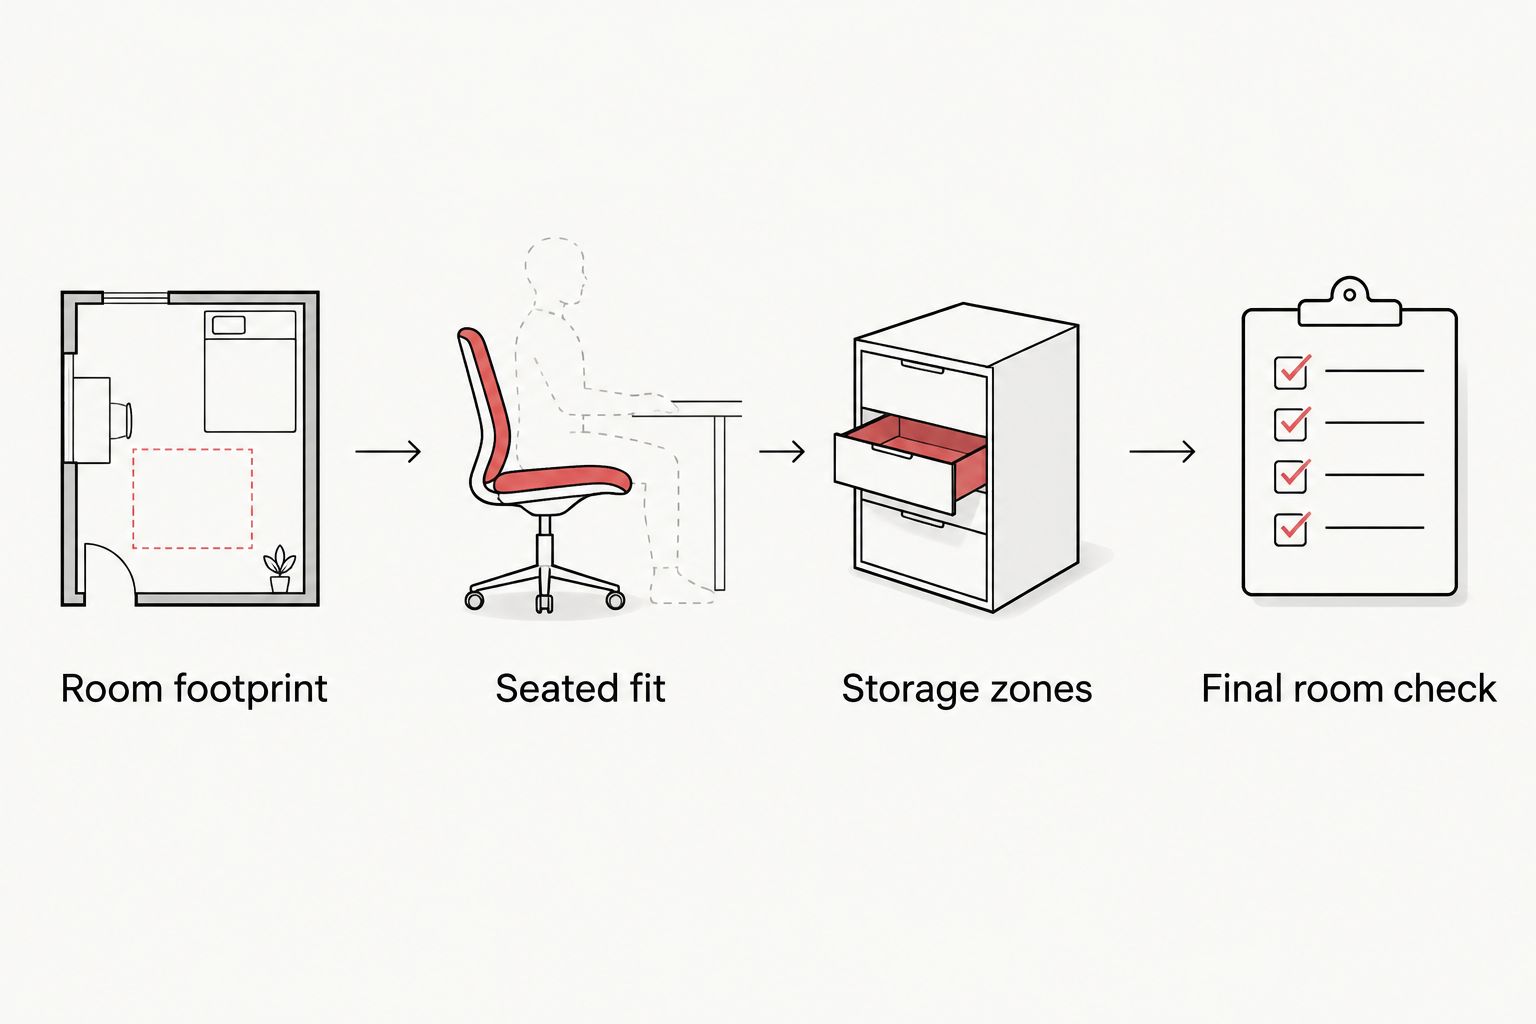
Second workflow: Refresh the setup when homework needs change
You do not need to redesign the whole room whenever school supplies change. Repeat the fit checks when you replace the chair, add a screen, or change the storage furniture.
For a 2026 back-to-school refresh, begin by clearing the desktop and removing unused supplies. Keep the bed’s approved structure unchanged.
- Recheck the seated position. A replacement chair changes sitting height and the space needed to stand up.
- Recheck the sightline. Place any screen where the user can view it comfortably without bending around a support.
- Reassign storage. Move daily supplies within easy reach and occasional-use items elsewhere.
- Repeat the access test. Open drawers, pull back the chair, and walk to the ladder again.
Best for growing families: A freestanding desk makes this refresh easier to plan because its position is independent of the bed’s structure. The trade-off is that every new position needs another clearance check.
Troubleshooting
The desk fits, but the chair does not
Check the chair with someone sitting in it and then standing up. Move storage out of the withdrawal path or choose a desk-and-chair arrangement that fits the measured opening. Do not narrow the ladder approach to rescue the desk layout.
The user hits a brace while standing
Move the sitting position outside the obstructed area and repeat the test. If normal movement still puts the user beneath the brace, place the desk elsewhere in the room. Structural supports stay in place.
Drawers collide with the ladder or chair
Change the storage position before filling the drawers. Test the full opening, not just the space needed to reach inside. A smaller storage unit is preferable to a daily routine that requires moving the chair into the access route.
The mattress leaves too little guardrail above it
Stop using the upper sleeping surface until the mattress and guardrail arrangement meets the manufacturer’s instructions and applicable safety requirements. Do not add homemade guardrail extensions or remove mattress supports.
The work surface feels dark or cramped
Test suitable task lighting first, then reassess the actual seated clearance. Lighting cannot correct insufficient headroom. If the space remains uncomfortable, use the area for permitted storage and move homework to another location.
Customize your workflow
Expand the setup by improving organization, not by attaching more objects to the frame. A clear desktop, accessible supplies, and a comfortable chair make room for homework and drawing without turning every surface into storage.
Before ordering a custom configuration from Bunkbeddepot, describe the intended sleeper, mattress, desk, chair, and room constraints. Ask for confirmation of the relevant dimensions and permitted connections. Keep those answers with your 2026 room plan.
Leave room for ordinary family use, too: carrying clean bedding, helping with homework, and reaching a dropped book. A layout that only works when everything is perfectly tucked away is not finished.
FAQ
How do I plan a loft bed desk and storage setup?
Measure the bed footprint, usable space underneath, and chair movement before choosing the desk or storage. Confirm the mattress limits and keep the ladder approach clear throughout the layout.
Can I put any desk under a loft bed?
No. A desk must fit between the bed’s posts and supports while leaving comfortable seated clearance and room to withdraw the chair. An attached desk also needs explicit compatibility with the bed.
What age can a child sleep in a loft bed?
Children younger than 6 years should not use the upper sleeping surface, following CPSC bunk-bed safety guidance. Also follow the loft bed manufacturer’s age restrictions and instructions.
How thick can a loft bed mattress be?
Use the maximum mattress thickness specified by the bed manufacturer. CPSC bunk-bed guidance requires the guardrail top to remain at least 5 inches above the mattress surface; do not choose thickness by comfort alone.
Is a separate desk better than a built-in desk?
A separate desk is better for families who expect to rearrange the room. A manufacturer-approved integrated desk suits a stable layout, but its fit and attachment method depend on the exact bed configuration.
Can I attach storage shelves to a wooden loft bed?
Attach shelves only when the manufacturer permits that exact connection. Do not drill into structural parts, remove braces, or use the frame as a furniture anchor without approval.
What should I recheck when updating the room in 2026?
Recheck seated headroom, chair withdrawal, drawer openings, cable routing, and the ladder approach. Repeat these checks whenever the mattress, desk, chair, or storage changes.
One last thing
Test the room with the chair pulled out and a drawer open. A photograph usually shows everything tucked away; family life does not. If the ladder remains accessible and your child can leave the desk comfortably, the setup has passed a more useful test than looking tidy.


